We can proudly say – box braids are one of the most classic and prettiest hairstyles. Considering this, many women adore them, wear them as much as they can, and style them in many different ways.
This said, you are probably wondering how to do box braids. Here are some of the best tutorials that will help you achieve a professional look in the comfort of your home.
Braiding – be there box braids, buttefly braids, or any other kind of meticulously weaved hair – takes time, sometimes even a whole day. Take that into consideration before starting. You will need some products for hair protection and a bit of patience.
How to Do Box Braids: 5 Different Tutorials
1# Knotless Box Braids
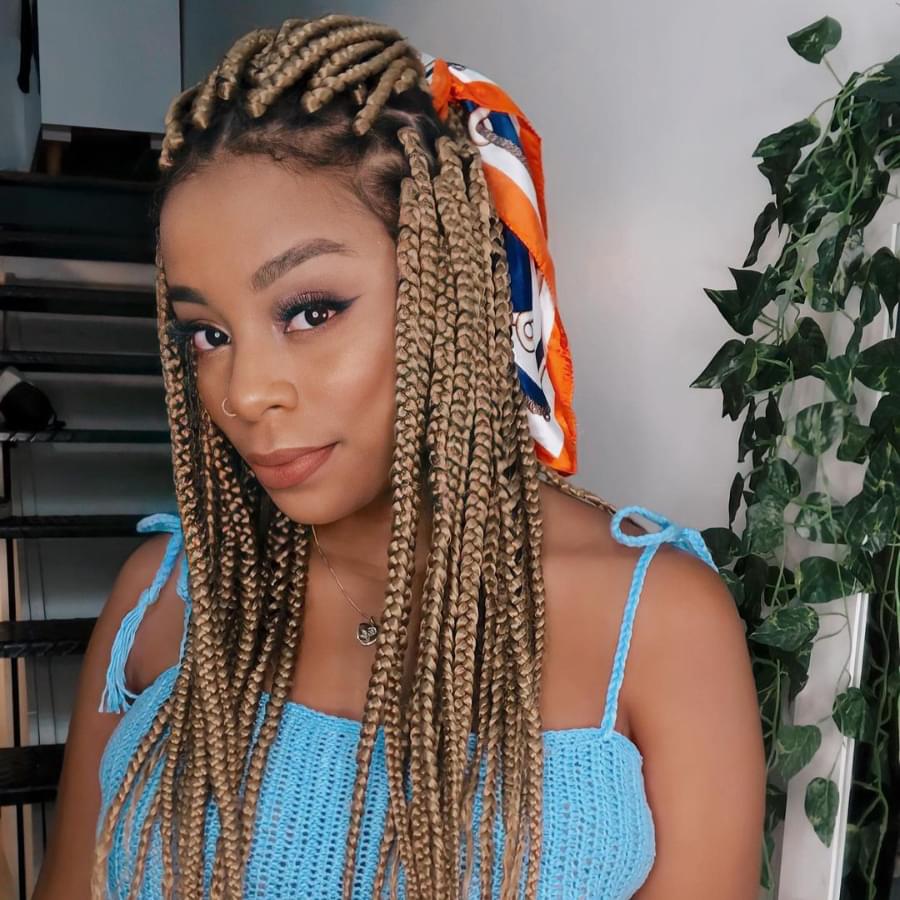
The most important thing for braiders is sectioning the hair they are styling. This woman shows us how to do box braids with half of the hair and knotless.
She starts by sectioning the hair in half, then checking the area to see how many braids she will do. After that, she sections even smaller parts and braids them. This is how your braids will be equal.
As she braids, she also adds a piece of crochet hair. Don’t add too much hair at the roots – they can look bulky. She repeats the process until she gets the thickness of the braids she desires.
Some people say that knotless box braids last shorter than regular ones. However, this way of braiding your hair is more convenient and even healthier. They are less sticky on the roots, you can style your hair as you walk out from a salon, and they do less damage in general.
2# How to Create Jumbo Box Braids
This is quite a prominent box braid style. To make such lovely jumbo box braids, you should start by preparing your hair for braiding. It means sectioning, putting on coconut oil to grease those parts, and applying the holding jam all over the roots. In the end, brush it well, so it gathers all together.
For this style, you should have bands for your hair. Elastic ones are a better choice than rubber bands since they are better for your hair. As you section the hair, put the elastic on and make a ponytail.
Since protective styles can stay up to six weeks, it is essential to moisturize your hair. Use a leave-in-conditioner and coconut oil for your natural hair, so it stays healthy.
For this tutorial, you will need a few packs of braiding hair. From one pack, you can make up to four box braids. Section the hair into three parts and make a knot. Wrap it around your natural hair and braid it tightly.
You can use the scissors to cut the excess of braiding hair and polish the hair edges. Seal the hair ends by dipping them in hot water.
3# How to Pull Off Bohemian Box Braids
If you ever wondered how to do box braids and add them that boho vibes, look no further than this tutorial. They are knotless, super long, and look lovely in any hair color. You will even get an insight into how to braid perfectly the back of your head, which is usually the tricky part.
You will need braiding gel, a comb, an edge brush, and braiding hair for this look. Separate the braiding hair until you get the desired thickness, and add a bit of a hair gel so you can braid smoothly.
Again section the part of braiding hair into three non-equal parts. As you braid, grab first the smallest, then the medium and largest parts. Braid until the braiding hair gets to the middle, and then add more hair.
For achieving wavy hair ends, gather a few braids into one and braid it from the middle or from the part where you stopped braiding your box braids. Dip those braids into a cup with hot boiling water.
4# Creating Short Box Braids
This tutorial starts with preparing your hair for braiding. Leave-in conditioner and coconut oil for locking that moisture that your hair needs every time you put on box braids.
This video shows how you can mix two colors of braiding hair to make ombre-inspired box braids. You take both of braiding hair and mix it into one braid.
You don’t need to use rubber bands for this style. You braid all the way until the ends, and they surely won’t come apart.
This technique doesn’t require a crochet needle. You wrap the Kanekalon hair around your natural hair and braid it.
5# Making Two-Toned Box Braids
Two-toned box braids look not only attractive but unique as well. You will need to find ombre crochet hair and prepare everything else you need for braiding – comb, oil, clips, and hair gel.
This woman warns us that the process can last up to seven hours. She explains that the most tricky part is sectioning your hair into equal squares.
After moisturizing hair with conditioner and applying hair gel, you start braiding. You start braiding your natural hair and add crochet two-toned hair. Use a comb to smooth down your natural hair and to make it even with the artificial one.
She seals the hair ends with boiling water. Due to the braiding quality or properties, she warns us to dip the hair even two or three times in the water until everything is sealed. Also, be aware – all the imperfections will be more visible on light blonde hair.