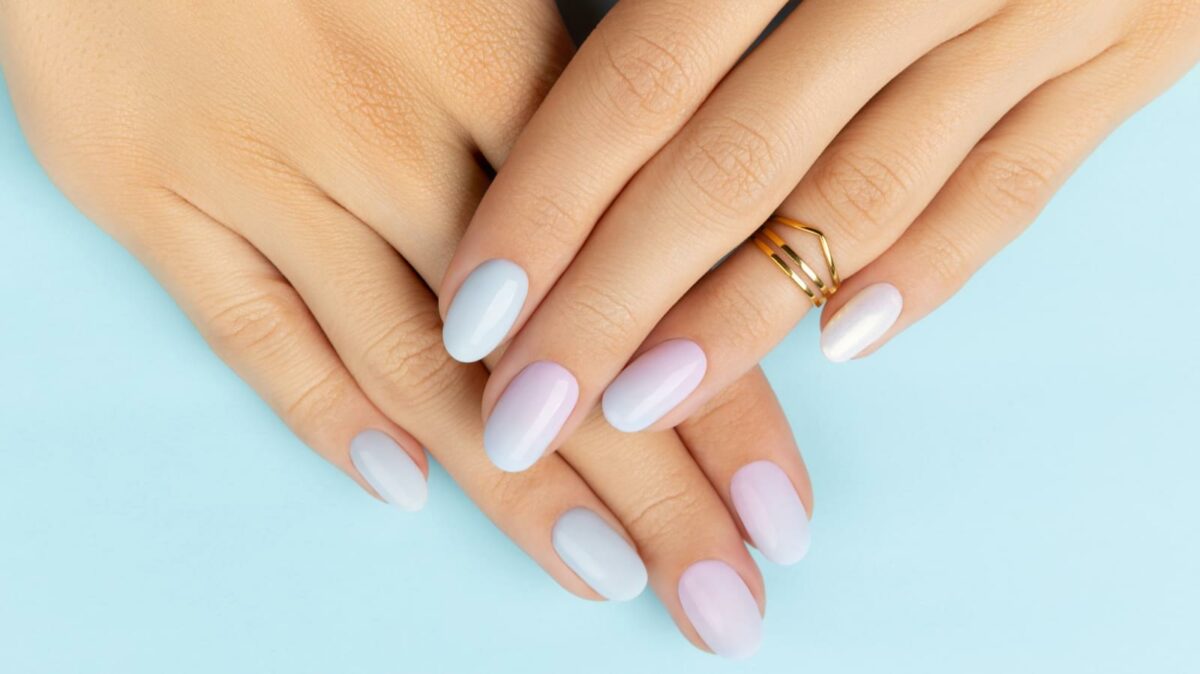
Ombre nails are always popular. This technique blends two or more colors across the nail, creating a gradient effect.
The tips of the nails are usually a lighter color, with darker hues at the base. However, there are so many possibilities when it comes to ombre nails! From bright neon shades to dark gothic looks, there is an ombre design for any occasion.
One of the best things about the ombre nails trend is how easy they are to do at home. If you are a DIY manicure lover but usually stick to block colors, learning to do ombre nails brings new ways of expressing yourself through your manicures. You don’t need to head to a salon to get your favorite nail look.
Let’s learn how to do ombre nails in this easy-to-follow tutorial!
The Materials You’ll Need
- UV light
- Two or more shades of gel nail polish
- Base coat
- Top coat
- Makeup sponge
- Nail buffer
- Nail file
- Nail clippers
- Cuticle oil
- Nail cleaning wipes
- Nail polish remover
Pro-tip: opt for gel nail polishes with similar shades, such as pale pink and a darker purple.
How to DIY Ombré Nails
When you have everything you need, it is time to create your own ombre nails! Make sure you set enough time aside to work on your manicure, as it will take time at first to really get to grips with the technique.
Step 1: Start With Clean Nails
When it comes to any DIY manicure, it is crucial to start with clean nails and prep correctly. Without prepping your nails, your gel manicure may come off. Before you begin, make sure you have removed any old nail polish.
Wash your hands and then take a gel prep wipe to them. Clean each nail, getting rid of any dirt and oil. Once you have done this, clip and file your nails to the length you wish and push back the cuticles. You may want to remove any skin from around your cuticles with your clippers, but be careful when doing this.
The next step is to buff your nail plates gently. It creates a roughness to them, meaning the gel nails will stick. Finally, give your hands another wash to eliminate any excess oils or dead skin that came off in the prepping.
Pro tip: Prepping your nails by buffing them is essential in creating a long-lasting manicure. However, over-buffing can damage your nails. Always be mindful of your nail health when doing DIY manicures!
Step 2: Apply a Clear Base Coat
Paint a thin layer of clear base coat onto each nail and cure them under your UV nail lamp. Base coats work to protect your natural nails and allow the gel polishes to stick.
Step 3: Apply The Colors to Your Nails
After picking out your ombre colors, take the color you wish to be at the bottom of the gradient nail polish and paint it onto half of your nails.
Then, blot some of the other polish onto your makeup sponge. Gently dab the makeup sponge on the tips of your nails and blend the two colors. It is helpful to take a nail brush to blend the colors.
Pro-tip: Start with a small amount of gel polish on your makeup sponge. If you need more gel polish on your nails, add more to the sponge.
Once you have blended the two colors, cure your nails under the UV lamp. Once they are dry, repeat this step.
We recommend doing this step two or three times to create a bold ombre manicure.
Step 4: Apply Any Nail Art
Once you have the ombre effect on your nails, you may want to add more nail art. Now is the time to place any stickers, gemstones, or glitter onto your nails. Get creative and bring your ombre fade to the next level!
Have a look on Instagram for ombre nail designs to get inspiration. Once you get the hang of the ombre nail technique, you have so many possibilities for your manicures.
Step 5: Apply a Top Coat
Now is the time to add a top coat to your ombre nails. This secures the design in place, making them last a long time. Opting for a matte top coat will create an edgier look. However, you must reapply the matte top coat every few days to keep that modern, shineless finish.
Step 6: Clean Up Your Nails
If you have made a few mistakes and your ombre nails look messy, don’t worry! Take a q-tip dipped in nail polish remover to your nails to clean up the edges.
Finally, apply cuticle oil to keep your nails healthy.
FAQ
How To Do Ombre Nails With Dip Powder?
You can easily create an ombre effect at home with dip powder. After prepping your nails and painting on a base coat, apply your first color to the nails. It should be light, with a darker color as your second color.
Then, dip your nail halfway into the powder. Leave it in for ten seconds, then gently brush the tips of the nails. Finally, slowly apply your top coat.
Can Ombre Nails Be Done With Regular Polish?
You can achieve the ombre nail trend with regular polish. Apply your nail polishes to a makeup brush, then gently dab them onto your nails.