
Today, you can’t go into a makeup store without seeing a contour palette or watch a makeup tutorial that doesn’t mention a highlighter. Numerous before and after makeup looks are also created by extensively employing this technique.
Nowadays, one can’t say the name “Kardashian” without also thinking “contour.” Reality star Kim Kardashian took over social media and won over makeup aficionados with her sculpted looks, and is credited with popularizing the modern, everyday contour look (though she did not invent it).
A History of Contrast: How the Contouring Trend Got Started
Where did the contouring trend start, anyway? Actually, it’s not a new phenomenon. Contouring can be traced back to the 1500s, where actors in Elizabethan England contoured their faces before taking the stage.
It’s only recently that Hollywood makeup artists’ tricks and techniques have been readily available to the general public just a click away — there’s no doubt that Marilyn Monroe and Audrey Hepburn’s makeup artists employed contouring techniques on these actresses.
But it would be a disservice to talk about face contouring without mentioning one of contour makeup’s master artists: drag performers. Men have been sculpting their faces to make them appear more feminine since as early as Roman times. Drag queens’ innovative techniques became somewhat mainstream with the invention of YouTube, making their secrets just a click of a button away.
But what is contour, really?
It’s essentially playing with light and shade. You don’t need to mold your face into any particular shape to contour. Instead, you can go as light or as heavy as you want. Contouring is fun and allows you to indulge your artistic side. It’s great for defining your cheekbones and other facial features, e.g. taking into consideration face shapes, whether in real life or on camera.
Another common myth about contouring is that you need a lot of different shades to do it. That’s not true — you can create contour easily with just two shades. You can use as many or as few products as you like; it all depends on your personal preferences.
If you will be doing a photoshoot or performing under intense theater or studio lights (like Kim Kardashian or many YouTube stars, for example) heavy cream contouring is a great technique to master. It might just very well be a good skill to have under your belt for family photos, prom, weddings, or special events so that your features aren’t washed out by professional photography.
Maybe you just want to have fun with your look— either way, follow our detailed guide to perfecting your contouring technique. If you’re stuck, you can always fall back on YouTube for tutorials like this one from MakeupByTiffanyD:
Product Breakdown: What Do I Need For Contouring?
Start with your eye makeup and base already on — if this means primer, foundation, eyeshadow, and concealer to you, go ahead and apply on before starting your contour. Give yourself a minute to make sure all liquid foundations and concealers are set before going in with contouring products.
Contrary to popular belief, you don’t need a whole arsenal of products to contour your face. At a minimum, you’ll need either a cream or powder product in at least two colors: a shade and a highlight. You will often be able to buy both in one single kit, but you can also personalize your contour and use two entirely different products.
Contour Must-Have: Shade
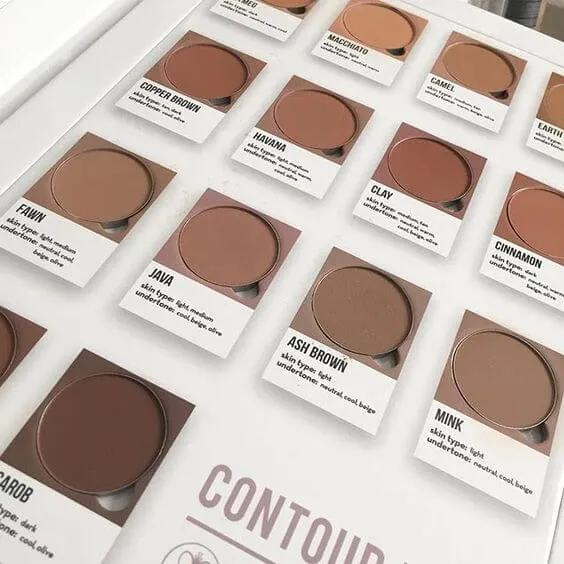
Look for a brand with a lot of shade variety, like this selection of contour shades from Anastasia Beverly Hills.
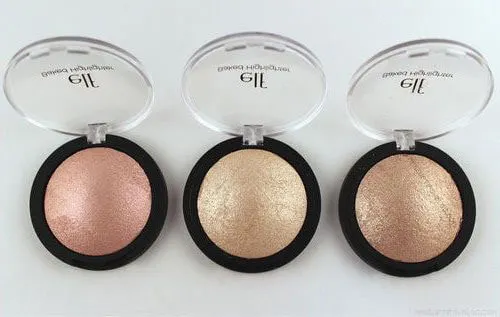
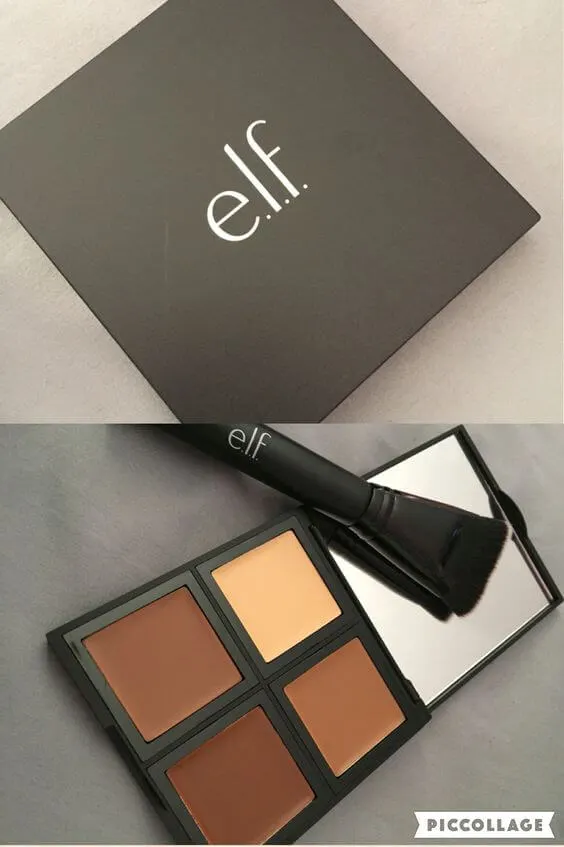
For a decent cream contour, the e.l.f. Foundation Palette at only $6 is great for beginners. It only comes in three shades, however, so another good option for deeper skin tones is the Sleek Contour Kit. Alternatively, fans of contour sticks may want to try Smashbox’s Step-By-Step Contour Stick Trio.
For powder contour, try The Contour Duo On The Go by acclaimed makeup artist Kevyn Aucoin. It only comes in the shade medium, so lighter skin tones may want to try NYX Powder Blush in Taupe with a highlighting shade of choice, and deeper skin tones may suit the Black Radiance Highlight & Contour Palette.
Kat Von D’s Shade + Light Contour Palette is a good pick for anyone in the medium to light range who wants a variety of shades to experiment with.
Remember, you can always use a matte eyeshadow that you already have to contour if you have the right color!
Bring Out Your Inner Glow: Highlighter
There are so many highlighter products on the market these days; it’s hard to know where to start.
You can get a perfectly good highlighter from e.l.f. such as the Baked Eyeshadow in Enchanted, but if you’re willing to pay more, Becca makes a fantastic high-end line of highlighters called the Shimmering Skin Perfectors.
Tools of the Trade: Brush or Sponge
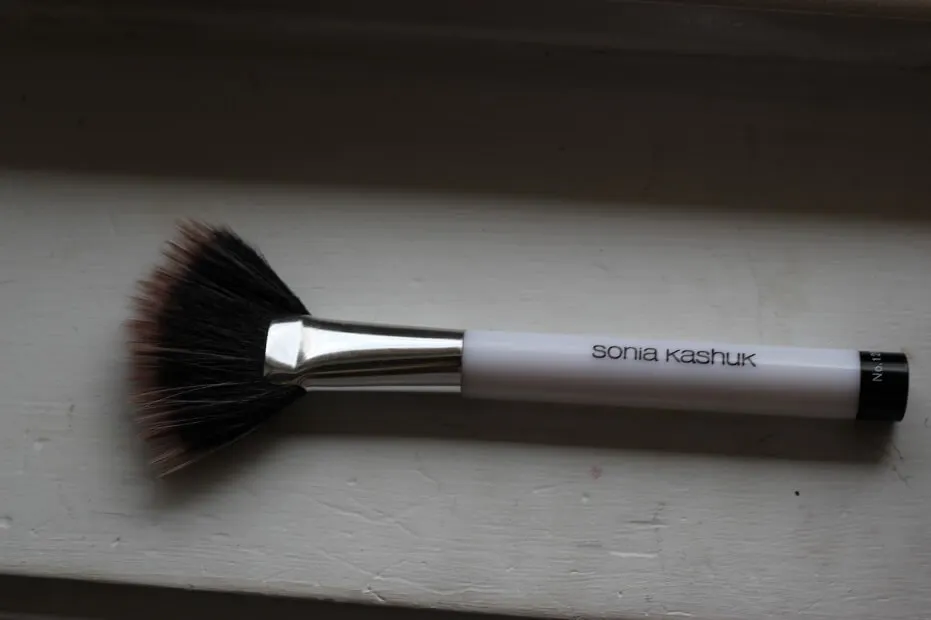
A fan brush like this one from Sonia Kashuk can double as a brush for both highlight and contour.
If you aren’t planning on using your fingers to apply your makeup, you’ll need either a brush or a beauty sponge. Popular brushes used for contour include fluffy, tapered, angled brushes like the Real Techniques Contour Brush or a fan brush such as the EcoTools Deluxe Fan Brush.
It may also be useful to have a blending brush on hands such as the Real Techniques Bold Metals 301 Flat Contour Brush or a fluffy powder brush like the itCosmetics All Over Face Brush for blending or setting translucent powder.
You might already have a beauty sponge that you love, but if that’s something you’re looking to purchase, consider either the original Beauty Blender or the Precision Beauty Blending Sponge by Swissco.
Perfect Contour In 4 Steps
Step 1: Let There Be Light (Cheekbone Highlight)
Beginners will find it easy to start with the cheek highlight, as it’s easy to get a feel for where to place your product.
Note: Some experienced contour enthusiasts will start by shading and then going in with highlight after, but if you’re a beginner, the cheekbone highlight is an excellent opportunity to get familiar with your facial features. The contrast will make the area under your cheekbone easier to find.
You might already have a highlighter at home, but if not, you can use a shimmery eyeshadow one or two shades lighter than your skin or choose any product marketed as a highlighter. These days, you can buy highlighters in liquid, cream, or powder form. Highlighters range from champagne, pink, golden, and terracotta, depending on the deepness of your skin tone. When picking your product, decide if you want your highlight to be more of a sparkly, seen-from space highlight or a subtle glow.
Next, get a sense of where the light hits your face. The first step is to know where to place the product, as everyone’s face shapes are different. Play around with this for a while. A highlight should sit at the top of your cheekbone — not at the sharpest or fullest part.
After you’ve chosen your product and established where you want to apply it, take your finger or brush of choice and lightly dust the highlighter onto the top part of your cheekbones. Some people prefer to use a fluffy, slim tapered brush, while others use a fan brush.
If you’re a beginner, you can stop here and get used to your new look as is, or you can continue onto the cheek contour. There is no one size fits all contour, so get ready to personalize it to your face shape.
Step 2: Create Shadow (Contour)
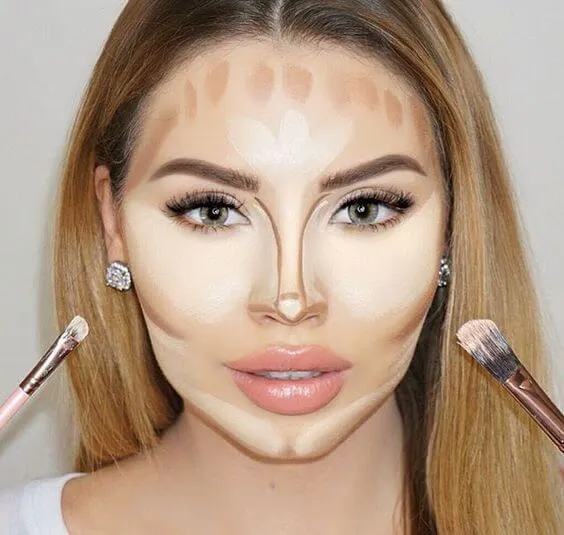
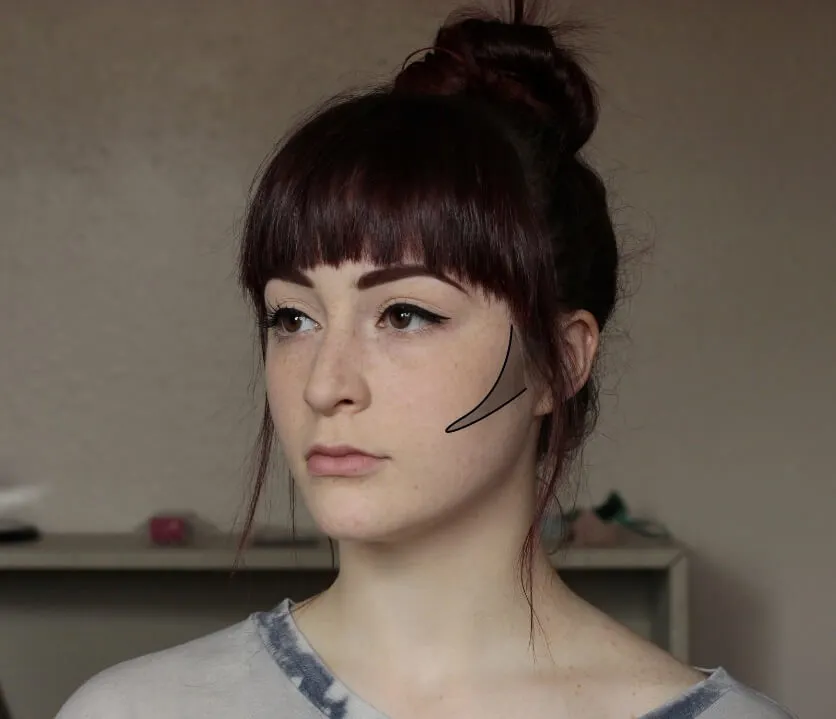
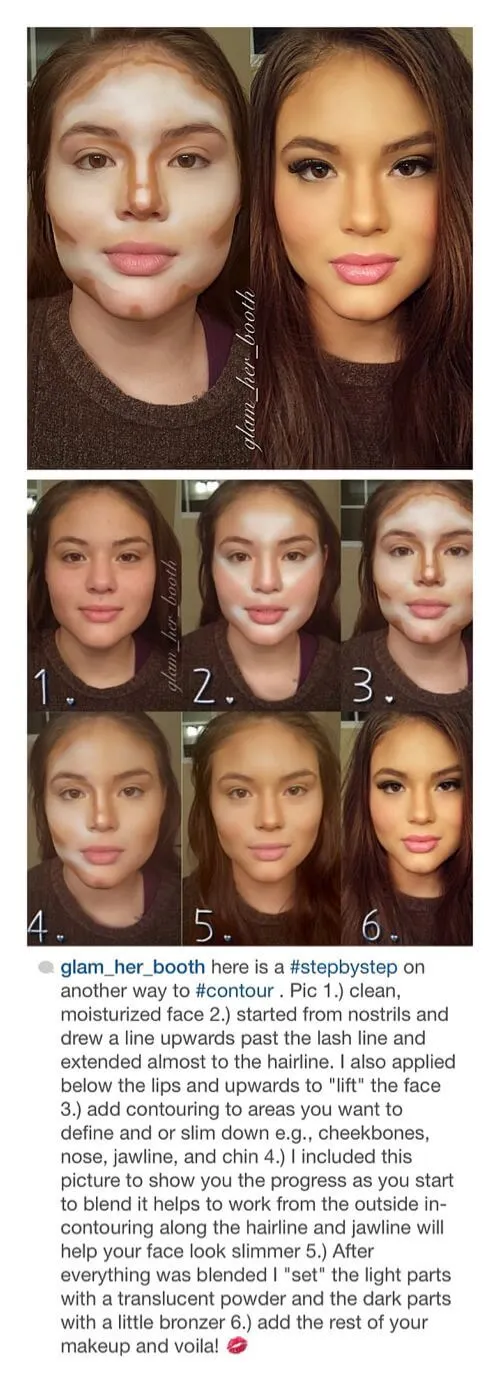
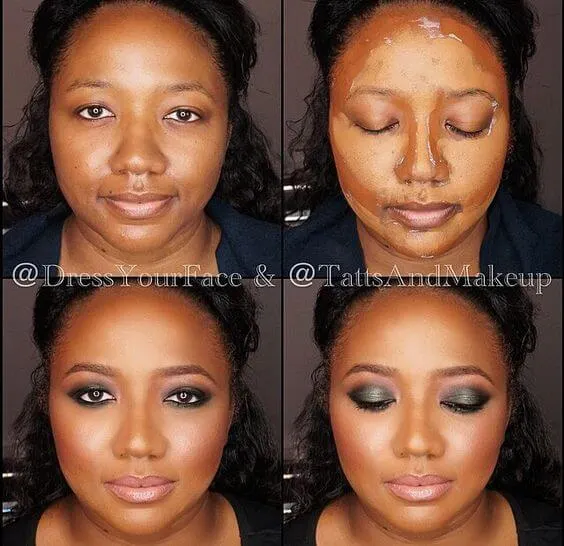
The small shaded triangle as seen in the picture below is where you should place your cheekbone contour.
When choosing a contour product, keep in mind that a gray-based brown will mimic shadow, while a warmer brown will add warmth and glow to your skin. There are several consistencies that you can buy, including cream and powder. Cream contours come in palettes or sticks, and powders can be bought individually or in a palette as well.
For beginners, the powder is often easier to manage and correct mistakes with, but cream contour palettes or sticks can help you achieve that really dramatic contour and stand out in photographs. If buying individual shades, be sure to purchase shades with the same undertones, i.e. several warm shades or several cool shades.
While we do want to create contrast, a common makeup mistake is to go more than two shades darker than your skin tone. Stick to something not too far off from your current foundation shade. It’s also a good idea to stray from shimmery contour colors, which reflect light instead of absorbing it (as shadows are supposed to do).
For powder contour, the most common application technique is to define with an angled brush, then blend or buff out with either a flat kabuki brush or a fluffy powder brush. Always tap the brush lightly to remove excess powder before application.
For cream contours, you can also blend and apply with your fingers to warm up the product or use a damp beauty sponge or brush such as a short stippling brush. If you have one, you can also use a foundation or concealer that’s too light for you to do the cheekbones, forehead, chin, and other areas you want to highlight.
The contour should be placed directly under your cheekbones. If you press down on your cheek with your finger, you will eventually find the edge of the cheekbone. This is the correct placement. The shape of the contour will depend on what features of your face you want to play up or down.
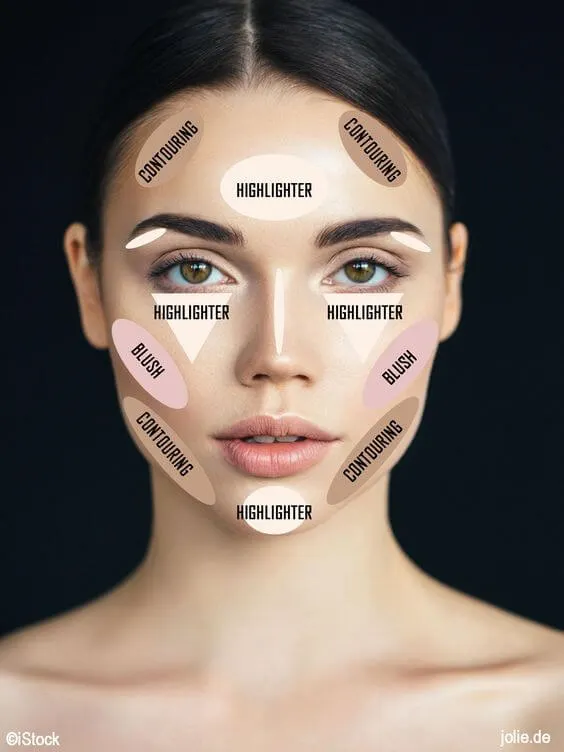
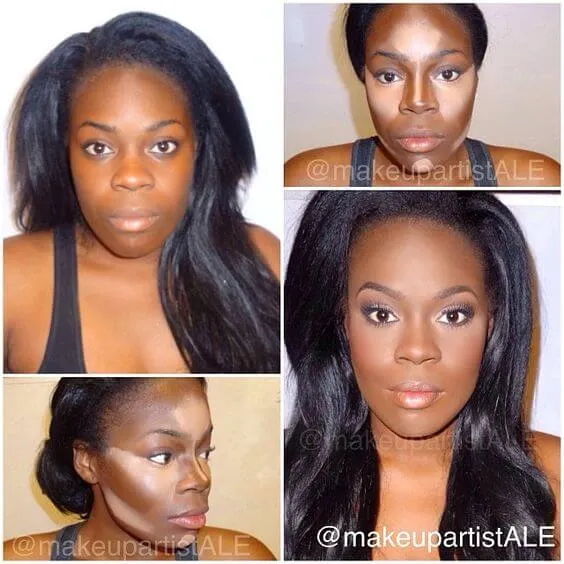
This infographic should give you an idea of how dark your contour shade should be compared to your skin tone.
Whichever part of your face that you first touch with your brush on will be the darkest area of the contour, so it’s good to start it close to the ear and move down towards the cheek. Ideally, use a light hand and build up pigment slowly. Avoid applying your contour further in towards your face than where the invisible vertical line down from the outer tip of your eyebrow meets your cheek. On most people, this is halfway.
Blend, making sure that instead of a muddy mess there is a clear gradient of color — the darkest shade should be in the hollows of your cheek. Blend up with strokes up towards your ear to lift the face. If you’re using a damp beauty blender, tap the bigger end of the sponge in small, circular motions on the cheeks.
Kim Kardashian famously uses a “3” shape starting at the forehead, going down towards her ears and out towards the apples of her cheeks, then back in again and finishing off at her jawline. This is a proper technique for slimming the face and adding definition.
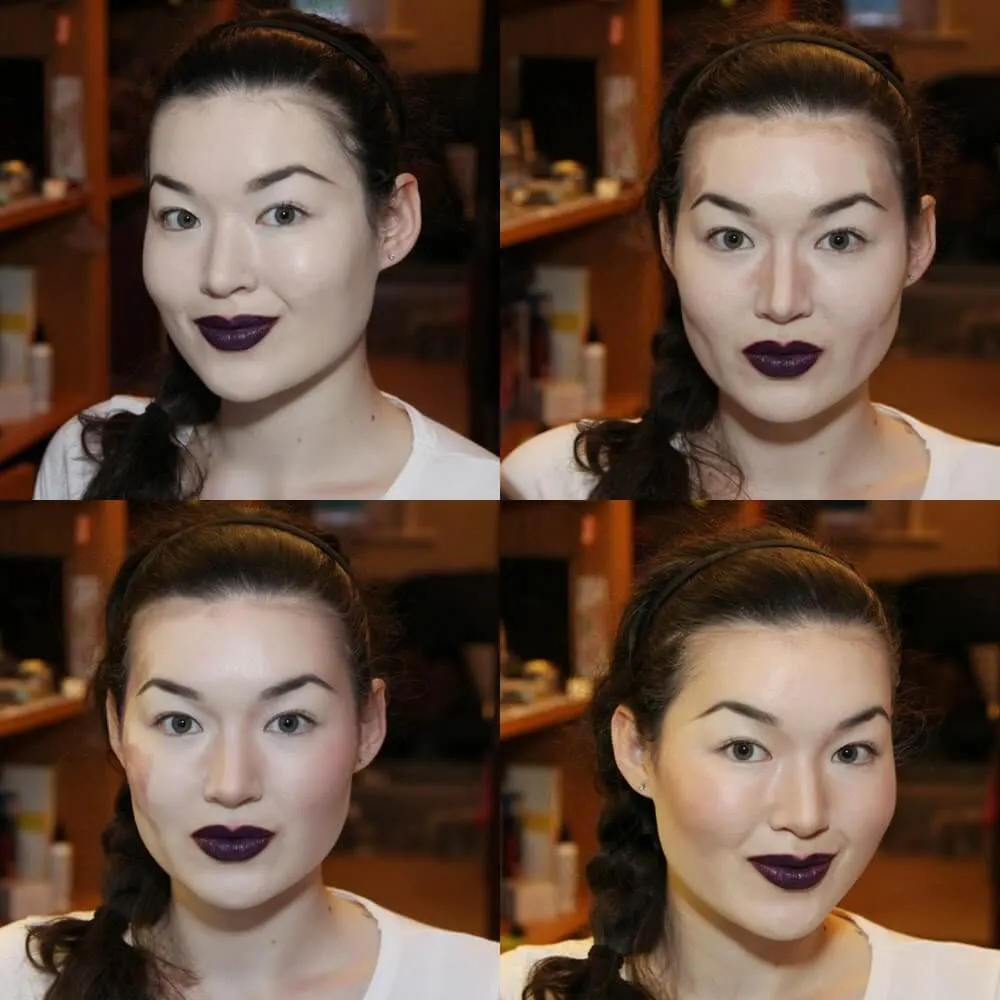
More oval-shaped faces, however, will want to use a different technique. Instead of a curve or circle, create a small triangle to add definition, as seen in the first photo. Do not extend it to the full length of your cheekbone.
When in doubt, just follow the natural hollows of your face. Where does the light naturally cast a shadow? Accentuate this. Make a kissy face towards the opposite side of the cheek you are contouring to see where you should put your dark contour.
Want to go further than just cheekbones? If you’re going to define your jawline, go ahead and apply your contour product right on your jawline and blend downwards. This is great for anyone who wants a stronger jawline or, if including the chin, wants to create the illusion of a rounder face.
If you have a small forehead, avoid contouring there to make your forehead look even smaller. If you do want to contour your forehead, apply the contour shade to your temples and across your hairline and blend back into your hairline.
Finally, many celebrities and YouTube beauty experts include nose contouring in their looks. To get on board with the nose contour, take a small, fluffy brush such as an eyeshadow blending brush and take it down both sides of the bridge of your nose. You can start as high up as the beginning of your eyebrow if you desire. Don’t forget to blend!
Step 3: Balance and Contrast (Highlight)
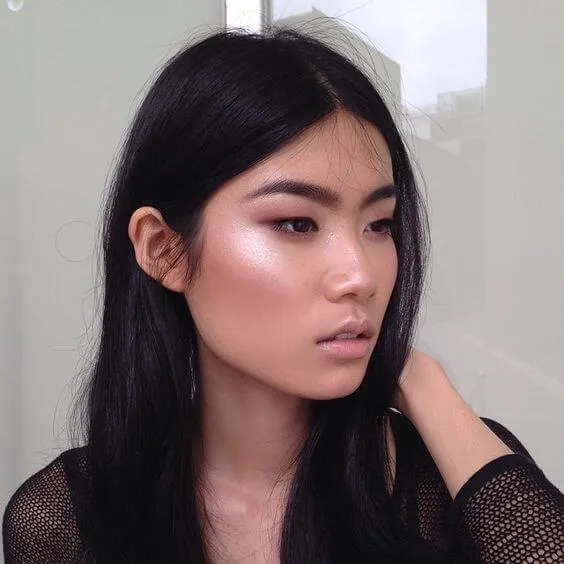
This makeup artist shows us her highlight unblended.
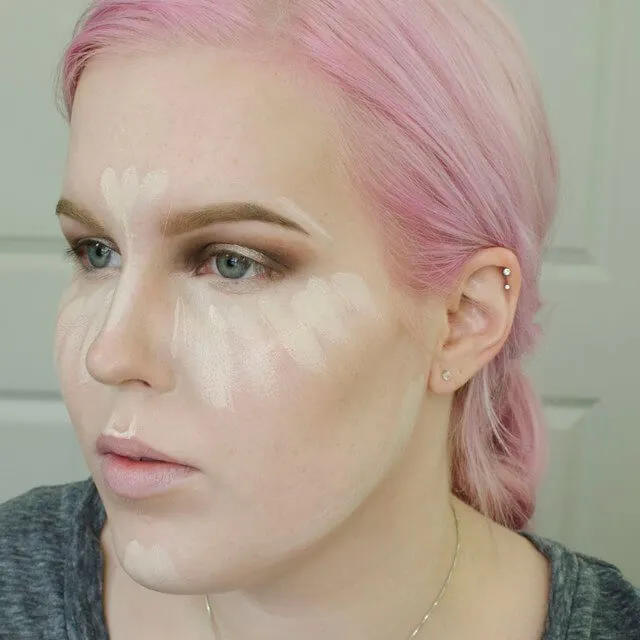
After you’ve blended your contour, it’s time to highlight! While some may be comfortable with just a cheekbone highlight, you can also highlight anywhere light naturally hits your face, such as the center of your forehead, the bridge of your nose, your cupid’s bow, your chin, and if you want, underneath your eyes. Blend in your highlight using your fingers or beauty tool of choice.
If you haven’t done it already, highlight your brow bone and inner corner. You can also take your highlight to define your brows by lining your eyebrows with a small angled brush and blending outwards.
Step 4: Finish Off The Look
The hardest part is over! All you need are a few finishing touches to pull the look together.
First, to make the contour look more natural, sweep a touch of blush above the contour line halfway into the apples of your cheeks.
Next, if you need it, buff a translucent setting powder onto your whole face to make sure everything stays in place through rain and shine.
Then, finish the rest of your makeup, whether that’s applying false lashes, lipstick, or even Chapstick.
Contour for Pros: Advanced Tips
If you want to give advanced contouring a go, you can use what you know about shade and light to make your face look rounder, skinnier, or more defined. We’ll take you through some of the most common face shapes and their most famous contouring techniques.
If you have a square or round face and would like to make your face appear more elongated, shade underneath your cheekbones as well as along your jawline. Make your forehead look narrower by adding contour to the sides of your forehead and along the temples, but not along your hairline.

Then, highlight the tops of your cheeks, in the middle of your forehead, and the center of your chin. Those with round faces may want to play up their cheekbones by really building up the contour underneath their cheekbones.
Long or oval-shaped faces should focus on contouring the chin and forehead rather than cheekbones. Go ahead and give your cheekbones dimension to lift your face, but focus primarily on contouring the top of your forehead and the chin to give the appearance of a fuller face. Highlight parts of your face that will make them look fuller, like the forehead, cheeks, and cheekbones, the center of your nose, your chin, and on your cupid’s bow.
This blogger adds roundness and definition to her rectangular face by shading the hairline and cheekbones.
Heart-shaped faces are lovely and unique, but if you would like to take away some of the emphasis on your chin, shade the forehead, temples, and cheekbones. You can also add a bit of shade to the very tip of your chin to soften it a bit. Add a highlight to the center of your forehead as well as the top of your chin and jawline to balance the face.
Lastly, anyone with a rectangular face can make it appear more rounded by contouring your hairline, cheekbones (be sure to contour downwards towards your jaw), and jawline, highlighting your under-eye area and chin.
For anyone interested in adding definition to your lips, adding just a touch of contour underneath your bottom lip can give the appearance of fuller lips.
Remember, all face shapes are beautiful and unique! While contouring can help you embrace your natural face shape, remember to appreciate your own individuality.