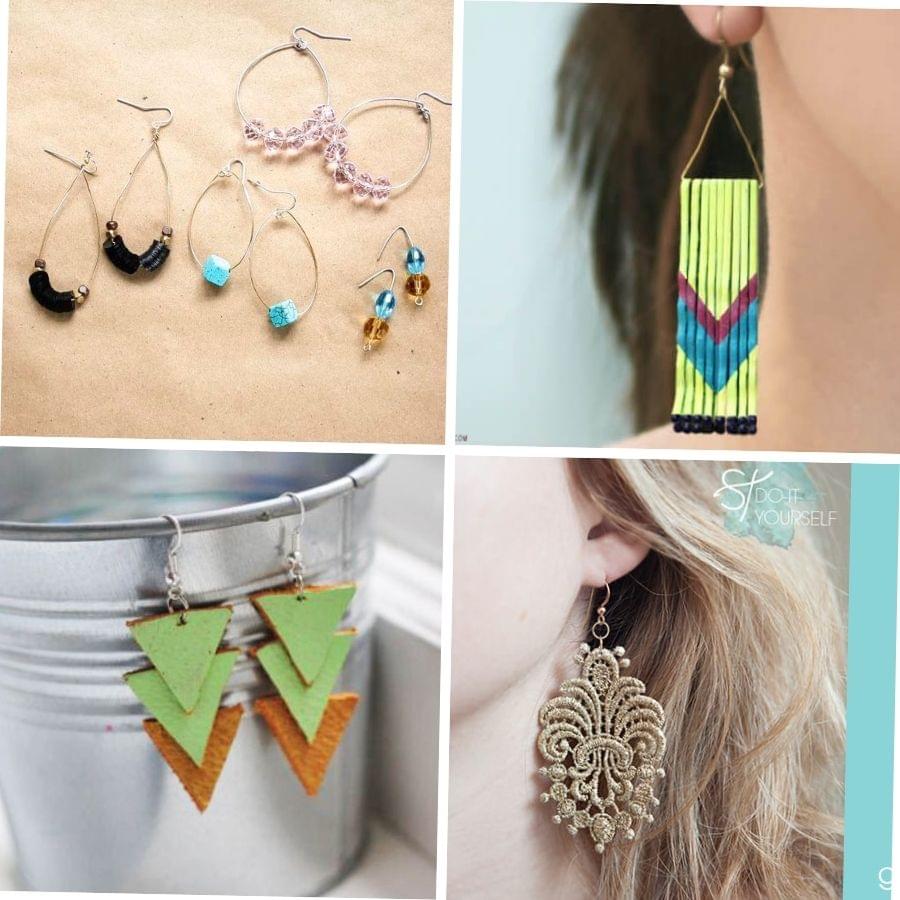
Have you ever walked through the jewelry section at a craft stall, a flea market, or even a high-end department store and thought to yourself, “I bet I could make that”? Well, guess what… you can.
Do-It-Yourself jewelry is becoming more and more popular, thanks in part to inspiring craft-filled websites like Pinterest and Etsy (the latter website even offers you the opportunity to sell your handmade wares online and earn some extra money). But don’t just take our word for it. We show you exactly what you need to sport your crafty prowess and create your very own fabulous DIY earrings.
RELATED: 20 Fabulous Necklace Design Ideas
What Is The Best Wire For Making Hoop Earrings?
Before we start, let’s briefly discuss about what is the best wire for making earrings.
The first aspect is the thickness of the wire, as the wire has to pass through the ear lobe easily. In general, a 22-gauge wire is often the best. A 20-gauge wire will be stronger, and should also work when passing through the ear lobe.
Another thing to consider is the material. Sterling silver, gold-filled, and niobium wires are good choices for earrings. They are least likely to cause skin irritations.
Sterling silver and gold-filled wire come in three tempers: dead-soft, half-hard, and full-hard and will not lose their color when hammered. As you will see, a hoop earring is usually formed around a hoop form or dowel once for each earring. Full-hard will work well for this and will not require any additional hardening once formed. Dead-soft or half-hard tempers will form easily around the form. You may need to hammer lightly on an anvil or bench block to set the shape.
DIY Earrings Tutorials
#1: Great-Looking Hoop DIY Earrings
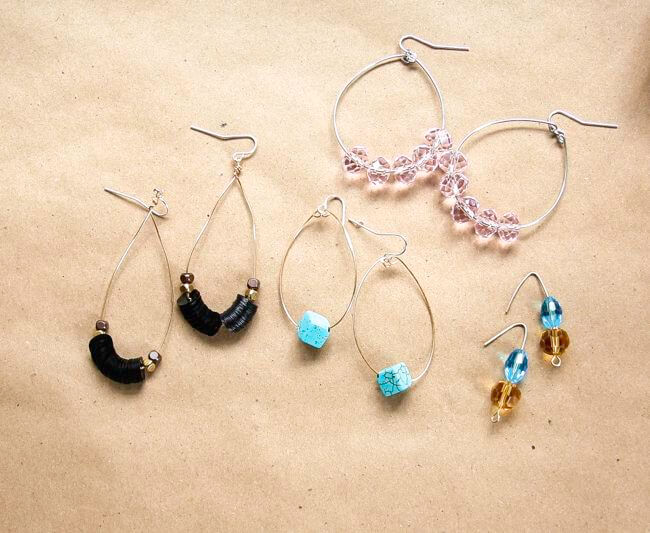
Hoops are probably the simplest of all DIY earrings to make and a good place to start if you’re a beginner. They are versatile in shape and design too – add your own selection of different beads in all sorts of colors, materials, and densities to create accessories that are truly your own. We show you how to create three standout designs using the same basic tools.
What you’ll need:
- Wire gauge (either number 20 or 22)
- Wire clippers (also known as wire cutters)
- Jewelry pliers (also called round-nose pliers)
- Small jump rings
- French earring hooks
- Eyepins or headpins
- Beads and sequins of your choice
Round Hoops
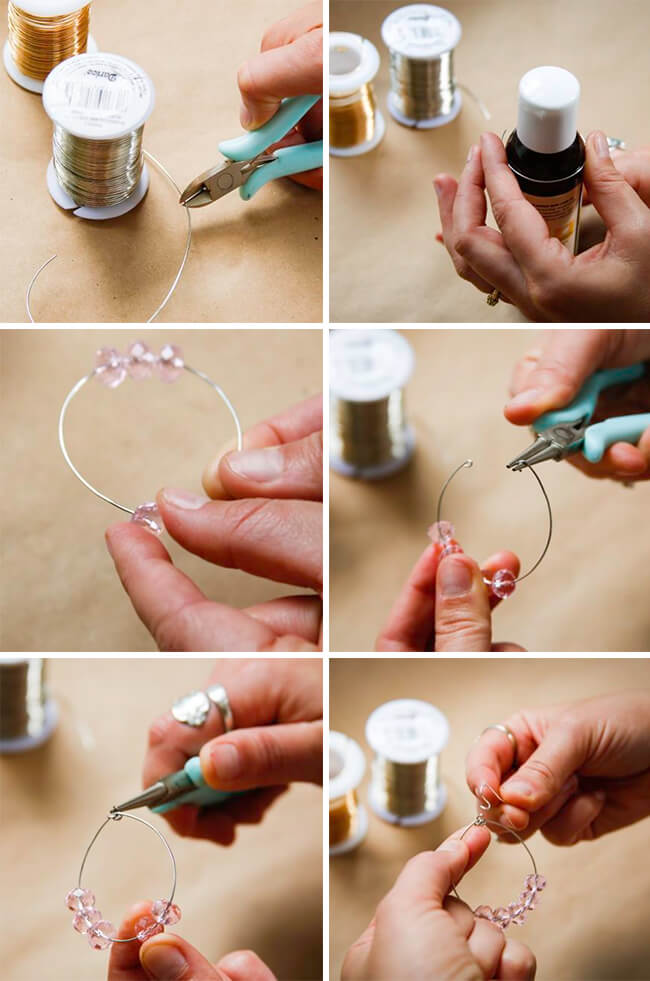
- Using the wire clippers, cut two strips of wire, each of them approximately 2.5 inches in length (63.5 mm). The length of the wire will determine how big your hoop will be.
- Find a small bottle and mold the wire around it to form a circular shape. Aim for a U-shape as you gently bend the wire.
- Get as creative as you’d like here, sliding on whichever beads tickle your fancy. Depending on the beads you’ve selected, you can add as many or as few beads as you’d like.
- Using the fine tips of the jewelry pliers, carefully curl the ends of both wire tips inwardly, forming small hoops.
- Push both ends of the wire together so that the loops rest on top of each other. Use a jump ring here to attach the loops together.
- Insert a hook earring into the jump ring and voilà!
Oval Hoops
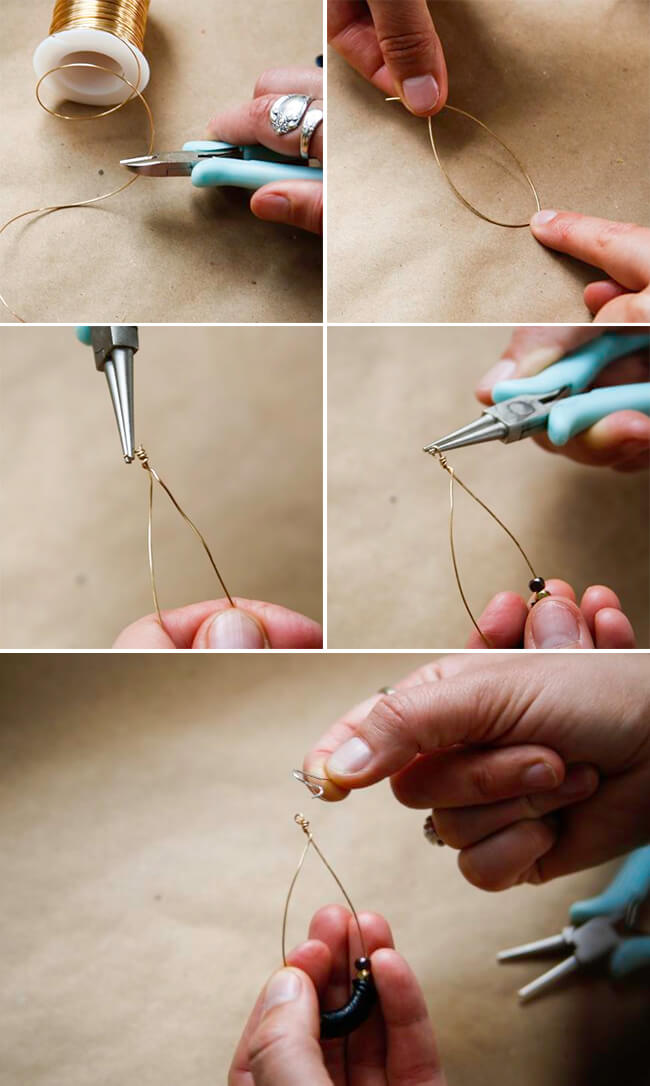
- Just like with the round hoops, cut two strips of wire but this time, aim for longer pieces – each one approximately 3 inches (76 mm) in length.
- Press down the middle of the wire using one finger, bending it to form a fish-like effect. Allow the ends to cross.
- Slip the beads onto the wire one by one.
- Using the jewelry pliers, twist one piece of the wire around the other three times, approximately ¼ inch away from the wire’s tip.
- Take this wire tail and curl it down into a loop.
- Finish by fastening an earring hook to this loop and there you’ve got your first oval hoop earring.
Eyepin Hooks
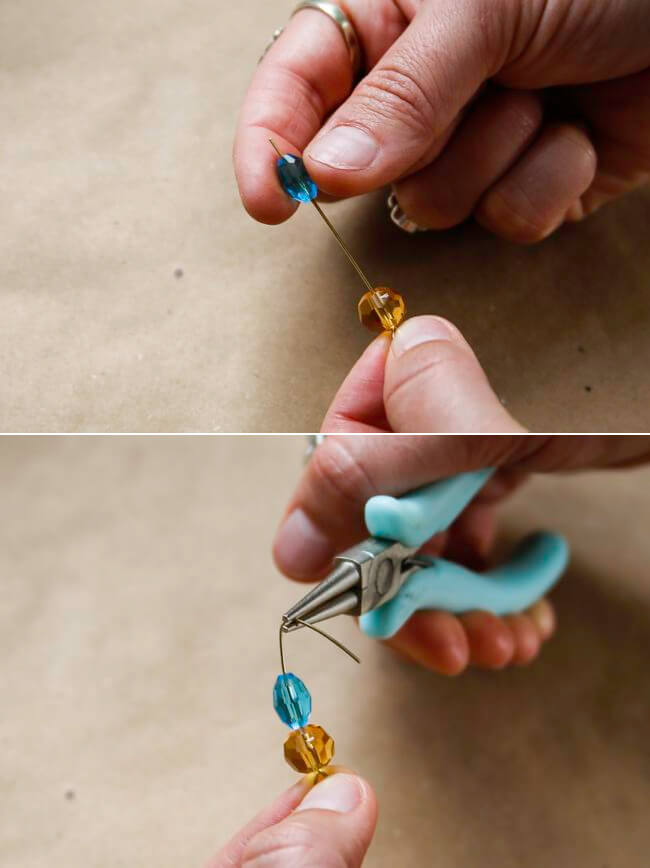
Remember we said hoop earrings were the easiest to make? We stand corrected: these earrings may just be the simplest, both in the tools you need and the level of skill required. All you basically need are two eyepin hooks, your trusty jewelry pliers and a few beads!
- Slip your favorite combination of beads onto a straight eyepin.
- Using your jewelry pliers, bend the tip of the eyepin into a hook.
You could add a French earring hook to the tip but that’s totally up to you. The eyepin hook on its own does the job of an earring hook just fine.
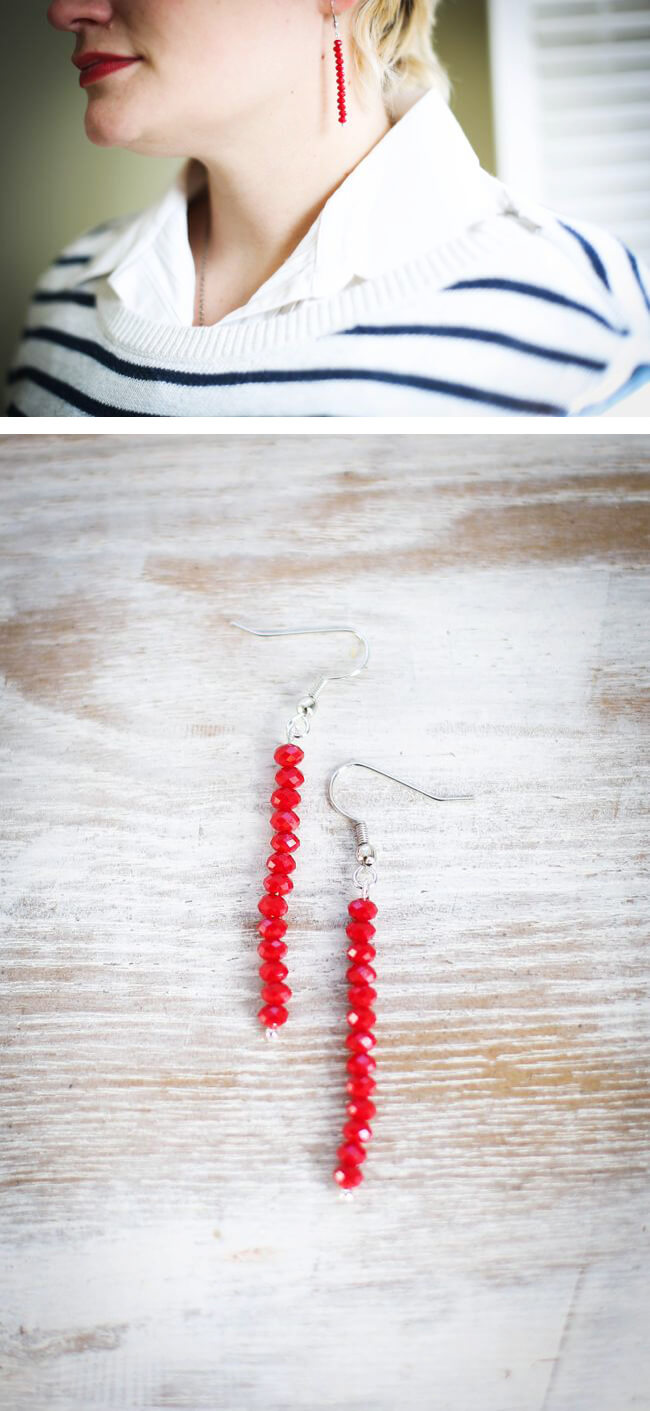
Here is another variation on the easy-to-make eyepin earring, made using the very same steps above, except with both ends bent into small loops and a French earring hook attached at the tip:
With thanks to helloglow.co
#2: Lace Applique Earrings
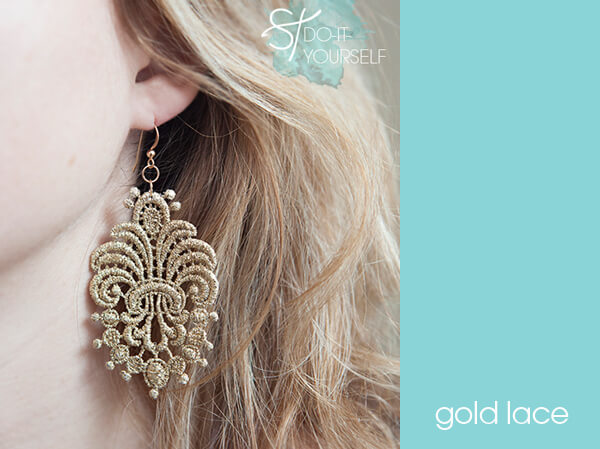
Maybe you’ve been invited to a really fancy event – a formal, black tie wedding maybe? Or perhaps you’d like to give your best girlfriend a thoughtful, personalized gift for her birthday. These dainty lace appliqué earrings are a perfect choice. As delicate as they are striking, these earrings have a pretty vintage effect to them and are as elegant as they are trendy. They look so professionally made, you may even find yourself taking orders from your nearest and dearest to make some for them too!
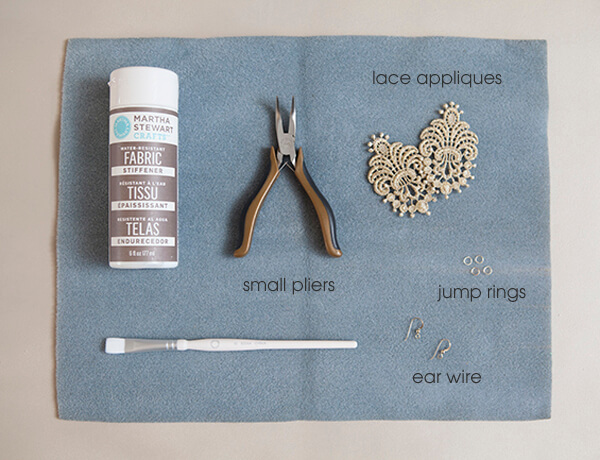
What you’ll need:
- A sheet of wax paper
- A bottle of fabric stiffener (you can buy this at any craft or fabric store)
- Two lace appliqués of your choice (also available at craft stores)
- Jewelry pliers
- Small paint brush
- Four small open jump rings (you also get the closed kind which is just a solid metal ring and cannot be opened)
- Two French earring hooks
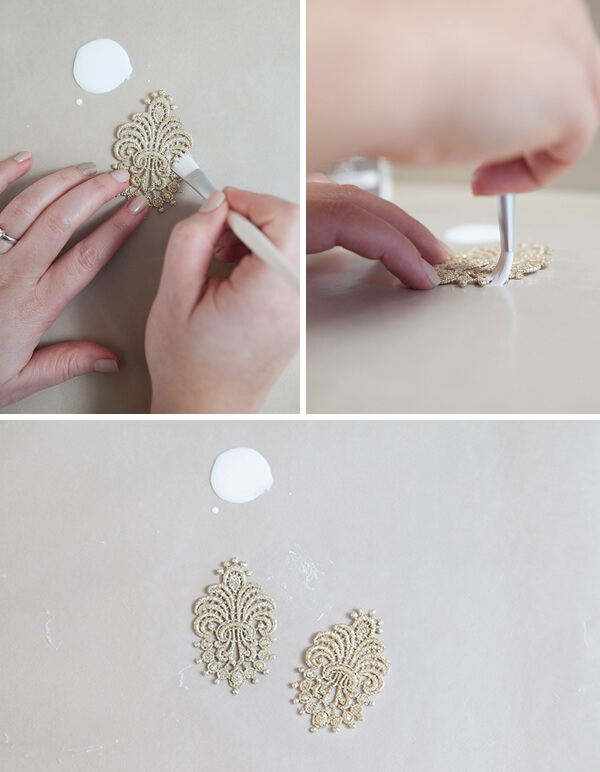
1. On a sheet of wax paper, lay out your two lace appliqués and paint a good layer of fabric stiffener all over each of them, both the front and back. Allow them to air dry completely for about an hour. This process is really important as the fabric stiffener will prevent the lace fabric from fraying or becoming discolored as you wear them.
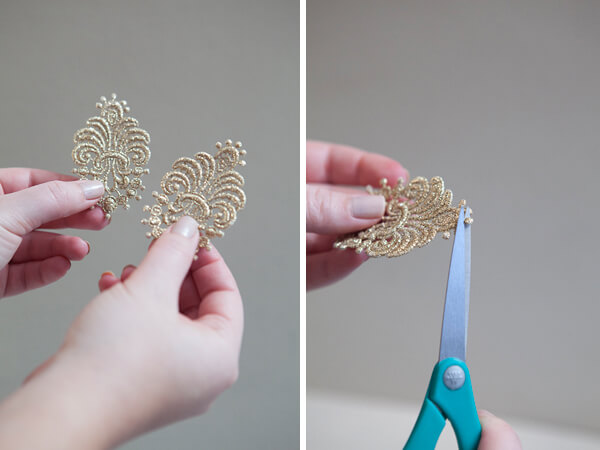
2. The next step involves tweaking the appliqués ever so slightly so that you create a space for the earring hook to fit into. This, of course, depends on the type of appliqué pattern you’ve chosen. The key here is to snip very carefully and not do any damage to the appliqué. Also, remember to make sure that both appliqués look the same when you’re done.
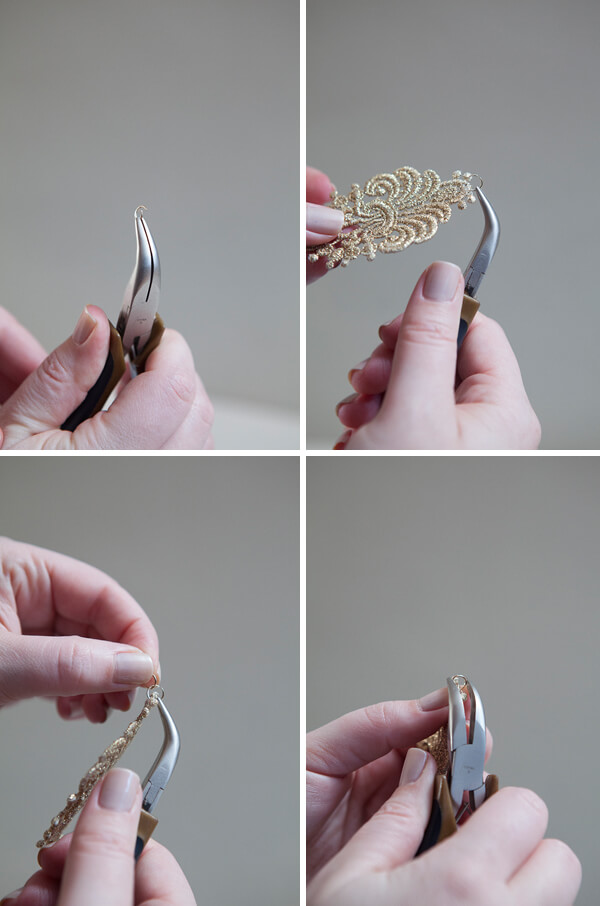
3. Using your jewelry pliers (the regular, straight-tipped ones you’ve used earlier will work just fine), gently bend open one of the jump rings and fit it into a gap at the top of the appliqué. Close the gap in the jump ring, before adding in a second jump ring to the first, so creating a small chain link.
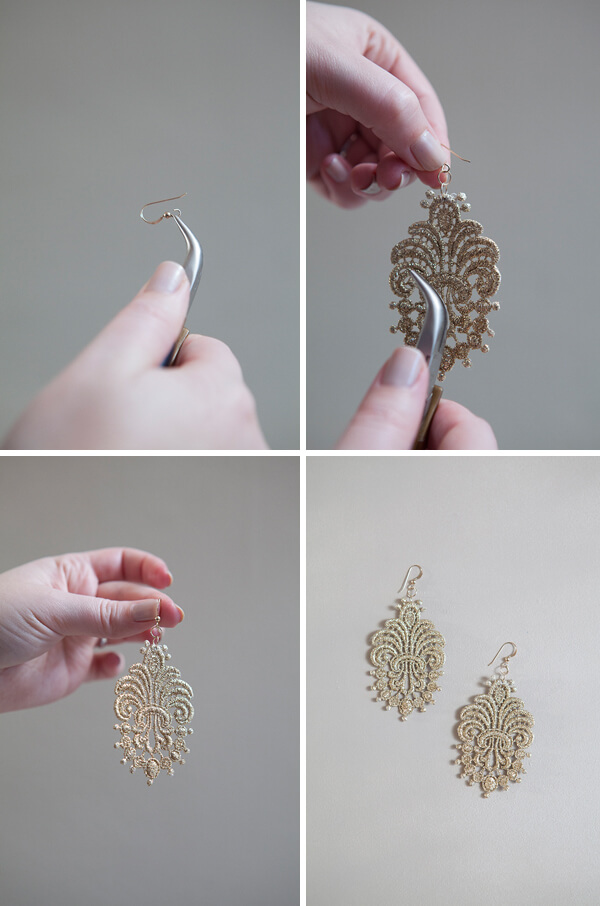
4. Your French earring hook should now slot perfectly into the jump ring. Be sure to close the fastening tightly but still gently. And there you have your very elegant (and very easy to make) lace appliqué earrings.
With thanks to greenweddingshoes.com
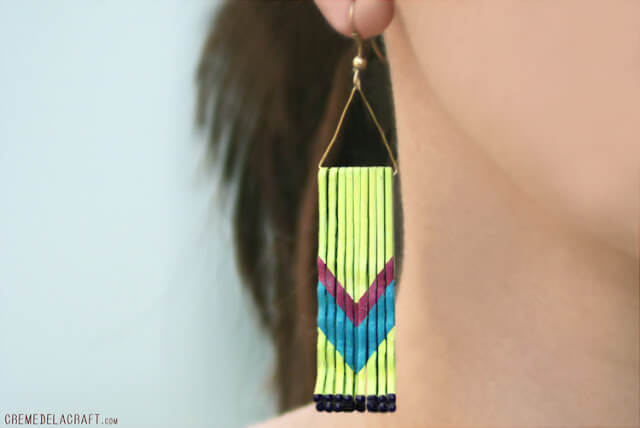
#3: Bobby Pin DIY Earrings
No matter what length of hair you have, there is one thing all women usually have an oversupply of – and that’s bobby pins. And with good reason. They’re really handy in a pinch – from pinning your hair back at the gym to creating feminine schoolgirl braids, the basic bobby pin is every girl’s go-to hair accessory. But did you know they make funky earrings too? Best of all, you can customize them so that they’re uniquely yours, and stylish enough to be bang on trend too!
What you’ll need
- About 16 bobby pins
- A small sheet of cardboard (a little broader than the size of your bobby pins all laid out side by side)
- Nail polish (choose your favorite colors – as many, or as few as you prefer)
- Clear nail polish
- A very thin paintbrush (about the size of a lip brush)
- A pencil
- Two earring hooks
- Two thin strips of wire
- Lay out your sheet of cardboard and fasten all of the bobby pins onto it, leaving a small space in between each of them.
- As a primer layer, paint one coat of clear nail polish onto all of the bobby pins. Let this layer dry completely before painting the other side too. Next, apply a base color of your choice to both sides – in the example here, a luminous neon green is the base. Remember to do this on both sides of the bobby pins.
- Using your pencil, lightly draw your design onto the pins.
- Now comes the really fine work. Using your small brush, carefully color in your design using the nail polish. Allow the polish to set and then apply a final layer of clear polish to give a glossy effect.
- Next, bend the thin wires into triangle shapes. Twist the very ends so that they meet and close.
- Once your bobby pins are totally dry, carefully remove them from the cardboard and slot them evenly onto the wire triangles. Attach both earring hooks and you’ve got your own bobby pin earrings!
With thanks to cremedelacraft.com
#4: Leather Triangle Earrings

Triangles are a huge trend right now – we’re seeing them everywhere from Aztec prints on clothing all the way to fashion jewelry. Funky leather triangle earrings are a great way to incorporate the latest style trend into your wardrobe without it costing you a fortune. The great part about it is that they are so cheap and easy to make, you can experiment with different colors and patterns – whatever your heart desires!
What you’ll need:
- A sheet of scrap leather (you can either buy this from a DIY craft store or even use the leather from an old handbag you no longer use)
- A ruler
- A craft or utility knife
- A small bottle of fabric paint in any color of your choice
- A small brush
- An all-purpose glue such as Aleene’s Tacky Glue (this is different from regular fabric glue, as leather is, strictly speaking, not a fabric. Here is a handy guide to different types of glue for any future DIY projects)
- Two French earring hooks
- Two jump rings
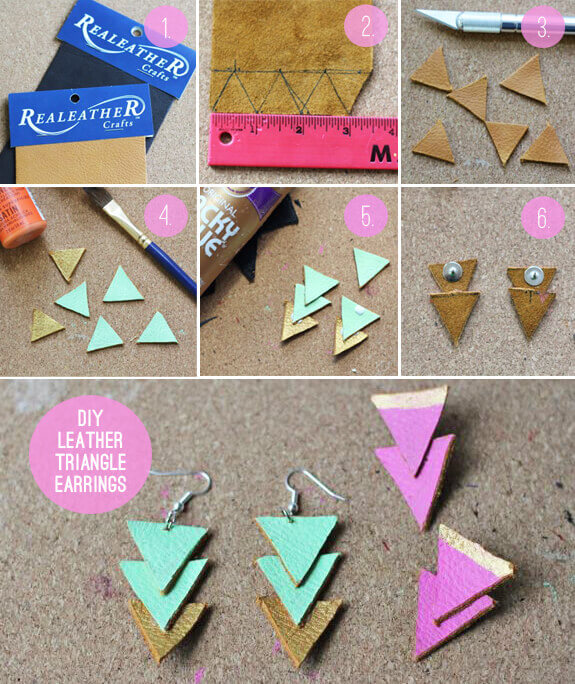
- Lay out the sheet of scrap leather on a flat surface.
- On the backside of the leather strip, measure out triangles one inch in length.
- Using your craft knife, cut out individual triangles.
- Paint over each triangle using the fabric paint, applying about two to three layers to each triangle.
- Use your all-purpose glue to stick three triangles together, as seen in picture 5 here. Allow them to dry thoroughly.
- You could either use earring posts for your earrings but a more durable method would be to use your utility knife to poke a little hole into the tops of each triangle shape. Then slot through a jump ring and earring hook into each of your triangle creations and there you have it – your very own leather triangle earrings.
With thanks to helloglow.co